
Published: July 31, 2026 | Last Updated: June 2, 2026
A Windows upgrade can look straightforward: download the new version, click install, and wait for the computer to restart. Compatibility is the part that deserves attention before that process begins. A PC may appear powerful enough for a newer version of Windows and still fail an eligibility check. Another computer may meet the minimum requirements but develop problems afterward because of an outdated driver, unsupported peripheral, encryption configuration, or business application that depends on an older version of Windows.
That is why checking compatibility should not be limited to comparing your RAM and storage with a short requirements list. A useful pre-upgrade review examines the computer as a complete system: processor, firmware settings, security hardware, available disk space, drivers, installed software, and recovery options. The goal is not simply to answer, “Can this PC install the upgrade?” A better question is, “Is this PC likely to continue working properly after the upgrade?” The following process helps answer both questions before you commit to a major Windows change.
Begin With Microsoft’s Official Compatibility Check
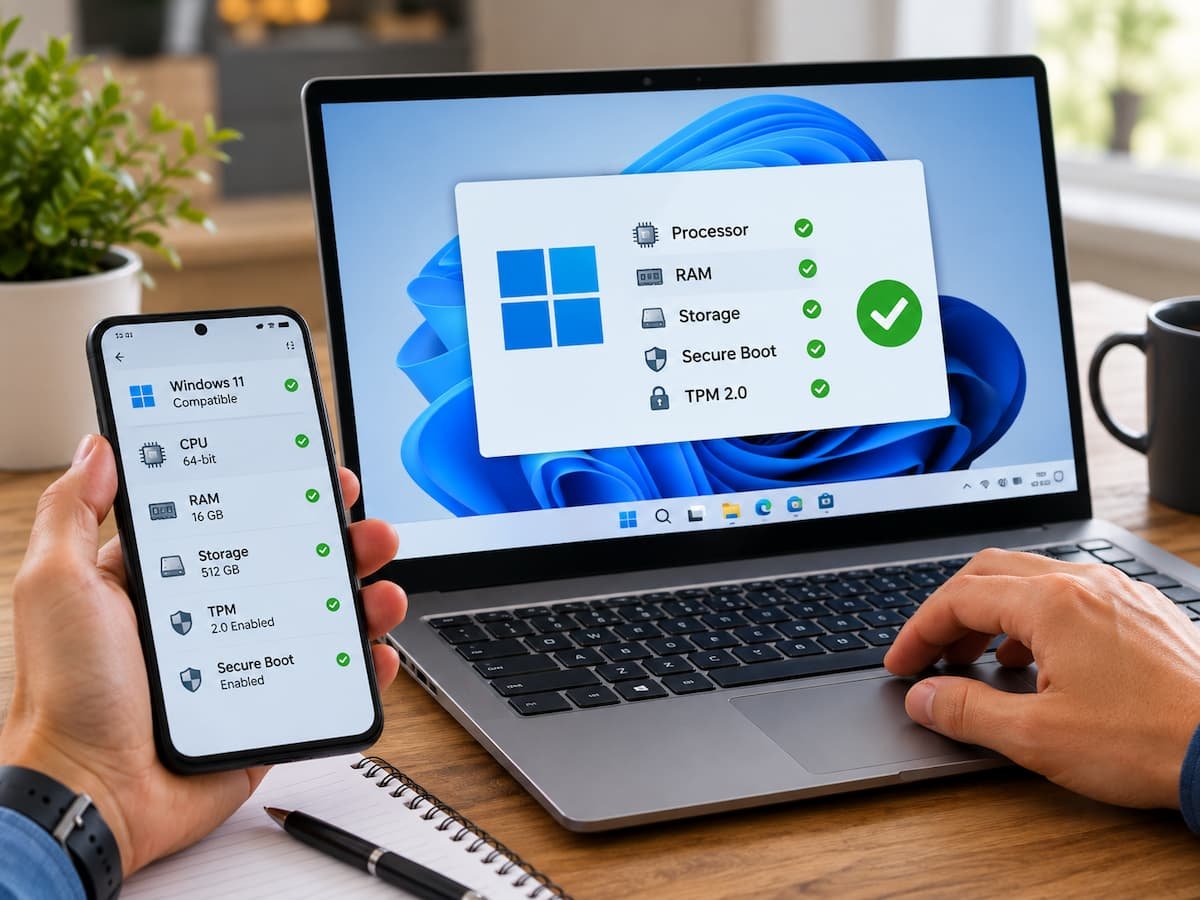
The quickest starting point is Microsoft’s own compatibility information and, where applicable, its official PC Health Check tool. These resources help you evaluate whether your device meets the requirements for a supported Windows upgrade. For a major upgrade such as moving to a newer Windows release, an automated check can identify obvious blockers. Depending on the version you are upgrading to, those blockers may include the processor, available memory, storage capacity, TPM support, or Secure Boot capability. An automated result should be treated as the first stage of the process rather than the final answer.
For example, a computer may pass the basic hardware assessment but still contain an older printer, audio interface, network adapter, or specialized application that has not been tested with the new version of Windows. The operating system may be technically compatible, but other parts of the wider computing setup may not be. Run the official compatibility check first because it gives you a clear baseline. If the device fails, please identify the exact requirement instead of immediately looking for workarounds. Some failed checks can be resolved through legitimate firmware settings or system updates, while others indicate a genuine hardware limitation.
Check Which Windows Version and Hardware You Have Now
Before comparing your computer with upgrade requirements, record the system you are actually using. Open Settings > System > About to review basic information about the installed Windows version, processor, installed memory, system type, and other device details. You can also use built-in Windows tools to view more detailed hardware information when needed.
This information matters because compatibility is often affected by the exact processor model rather than a general description such as “Intel Core i5” or “AMD Ryzen.” Two processors in the same product family may have different support status. Also check whether your Windows installation is 64-bit, especially when planning a major upgrade. Modern Windows versions and applications may have architecture requirements that differ from older software.
Write down or save the following information before proceeding:
- Current Windows edition and version
- Processor model
- Installed RAM
- Available storage
- System type and architecture
- Device manufacturer and model
- BIOS or UEFI version, where relevant
Having these details available makes it much easier to compare the PC with official requirements and troubleshoot a failed compatibility result.
Do Not Assume That CPU Speed Alone Determines Compatibility
One of the most common misunderstandings about Windows upgrades involves the processor. A processor may have enough speed and multiple cores yet still be excluded from support for a particular Windows release. Compatibility requirements can depend on the processor generation, security capabilities, architecture, and Microsoft’s supported CPU lists. This means that comparing only the clock speed can be misleading.
For example, an older processor running at a relatively high frequency may still fail an upgrade check, while a newer processor with a lower listed clock speed may be supported. When the upgrade requires a specific supported processor family, check the exact model against Microsoft’s current documentation. Do not rely solely on retailer descriptions, forum discussions, or assumptions based on the processor’s age.
A failed processor requirement is also different from a simple setting that you can change in Windows. If the processor itself is outside the supported list, the limitation may not have a practical solution short of changing the hardware or remaining on a supported version of Windows.
Check TPM and Secure Boot Before Assuming Your PC Is Too Old
Security requirements can cause compatibility checks to fail even when the PC hardware is otherwise suitable. For certain Windows upgrades, TPM 2.0 and Secure Boot support may be required. Some computers include compatible hardware but have the relevant feature disabled in the system firmware.
To investigate TPM status, Windows provides built-in tools that can show whether a TPM is present and which specification version it supports. Secure Boot status can also be checked through Windows system information. A failed check does not automatically mean that your computer lacks the capability. On some systems, TPM-related functionality or Secure Boot may simply need to be enabled through the BIOS or UEFI firmware settings.
However, firmware menus differ significantly between manufacturers and models. Changing security or boot settings without understanding the existing configuration can affect startup behavior, disk encryption, or other system features. Before changing anything, identify your exact PC or motherboard model and review the manufacturer’s documentation. If the computer uses device encryption or another security feature tied to the existing configuration, make sure you understand the recovery process and have any required recovery information available. The goal is to enable supported features correctly, not to change settings blindly until a compatibility warning disappears.
Check Available Storage With More Than the Minimum in Mind
A Windows upgrade needs more than enough space to store the final version of the operating system. The upgrade process may temporarily use additional space for downloaded installation files, backups, previous Windows files, and recovery information. A computer that barely meets the published storage requirement can therefore encounter problems during installation. Check available space on the system drive before beginning.
If storage is limited, remove unnecessary temporary files, move large personal files to appropriate storage, or uninstall software you no longer use. Avoid deleting files simply because they look unfamiliar. Windows system folders and recovery files should not be removed manually unless you understand their purpose. It is also wise to leave room for normal use after the upgrade. A nearly full system drive can affect updates, application performance, and the ability to create temporary files.
Storage is one area where the minimum requirement should be viewed as a threshold rather than a target. More free space generally provides a safer margin during a major upgrade.
Review Drivers and Connected Hardware
The compatibility of the computer itself is only part of the overall picture. Printers, graphics adapters, Wi-Fi hardware, external storage devices, audio equipment, scanners, webcams, docking stations, and other peripherals may rely on drivers designed for your current Windows version. Before upgrading, visit the computer manufacturer’s support page and check whether drivers are available for the target version of Windows. If you have a custom-built PC, be sure to check the support pages for important components, including the motherboard and graphics hardware.
Pay particular attention to devices that are essential to your work. A home user may be able to tolerate a temporary problem with an older printer. Someone who depends on specialized audio hardware, engineering equipment, or industry-specific peripherals may need to verify compatibility much more carefully.
If a manufacturer has clearly stated that a device is unsupported on the newer Windows version, do not assume that Windows will automatically solve the problem with a generic driver. Generic drivers can sometimes provide basic functionality, but advanced features may remain unavailable. Disconnecting unnecessary peripherals before a major upgrade can also simplify troubleshooting if the installation encounters a problem.
Check Your Important Applications, Not Just Windows
Software compatibility is easy to overlook because the upgrade check usually focuses on the operating system and core hardware. Before upgrading, make a short list of the applications you rely on most. This might include office software, accounting tools, creative applications, VPN clients, security software, games, specialized work programs, or older utilities. Check each important application’s official support documentation for compatibility with the Windows version you plan to install.
This is particularly important for older software. An application may still run on the newer version, but “probably works” is not the same as being officially supported. For critical software, check whether a newer version is required and whether upgrading the application introduces additional costs, changes, or hardware requirements.
If you use software that stores important local data, make sure you understand where that data is stored and how it can be backed up before beginning the Windows upgrade. The most frustrating compatibility problem is often not discovering that Windows cannot install. It is completing the upgrade successfully and then finding that an important application no longer works as expected.
Check the BIOS or UEFI Firmware Version
Firmware is the software that helps initialize hardware before Windows starts. A manufacturer may release BIOS or UEFI updates that improve stability, hardware support, or compatibility with newer operating systems. Checking for an available update can therefore be worthwhile before a major Windows upgrade. This does not mean that every computer should automatically receive the newest firmware immediately before upgrading. Firmware updates carry more risk than ordinary application updates if interrupted or applied incorrectly.
Review the manufacturer’s notes for your exact model. If a firmware update specifically addresses compatibility or a known issue relevant to your upgrade, it may be appropriate to install according to the manufacturer’s instructions. Do not install firmware intended for a similar-looking model. Exact model identification matters. If your computer is already running stable firmware and the manufacturer provides no upgrade-related recommendation, updating the firmware solely because a newer version exists may not be necessary.
Back Up Before You Decide the Device Is Ready
Compatibility checks reduce the chance of problems, but they do not eliminate every possible failure. A backup is therefore part of upgrade preparation rather than evidence that you expect the upgrade to go wrong. Before making major changes, make sure you copy important documents, photos, project files, and other personal data to a suitable location. If you use software that stores data locally, verify that those files are included.
A system backup can provide additional recovery options, depending on your backup method and needs. Also consider whether you have the information required to sign back into important accounts if the upgrade process requires recovery or reconfiguration. If device encryption is enabled, make sure you understand how recovery works before changing firmware or major security settings. A successful backup should be more than a copy process that finishes without an error. Confirm that the important files are actually accessible from the backup location.
Use a Compatibility Decision Framework Instead of a Single Pass-or-Fail Test
Once you have reviewed the PC, divide the results into three categories.
- Ready to upgrade: The PC meets official requirements, has important drivers available, supports critical applications, and has adequate storage and a verified backup.
- Potentially ready with preparation: The PC meets the main hardware requirements, but you need to update a driver, free storage, enable an available firmware feature, or update an important application before proceeding.
- Not officially compatible: The device fails a requirement that cannot realistically be corrected, such as unsupported hardware or the inability to install the required Windows version.
This approach is more useful than treating compatibility as a single green or red indicator. A computer in the second category may be a better upgrade candidate than a computer that technically passes every automated compatibility assessment but has unsupported business software or an essential peripheral with no compatible driver.
What to Do When the Compatibility Check Fails
A failed result should lead to investigation, not immediate panic First, identify the exact requirement that failed. Then determine whether it is a software configuration issue, an outdated component, or a fixed hardware limitation. If the problem involves available storage, you may be able to correct it through cleanup. If TPM or Secure Boot is supported but disabled, the manufacturer’s instructions may explain how to enable it safely. If the issue is an unsupported processor or missing hardware capability, there may be no supported software fix.
Avoid making registry changes or using unofficial installation bypasses simply to force an upgrade. A successful installation is not the same as having a fully supported system. Unsupported configurations may create future update, stability, or support limitations. If the current Windows version remains supported and meets your needs, delaying the upgrade may be the sensible choice while you plan a future hardware replacement.
Conclusion
Checking your Windows device’s compatibility before an upgrade involves more than just comparing memory and storage space against system requirements. A reliable assessment should cover details such as the processor, system architecture, TPM and Secure Boot status, available disk space, firmware, drivers, required applications, and connected hardware.
Start by using Microsoft’s official compatibility tools and documentation, then examine all factors that could affect your actual usage. Your computer might meet the minimum hardware requirements but still require preparation regarding drivers or software. Conversely, automatic checks can sometimes fail simply because a supported feature is disabled in the firmware. The most effective approach is to make a clear decision: upgrade immediately, prepare your system first, or continue using the current supported version until the hardware can be replaced. Taking the time to verify compatibility before upgrading is usually much easier than repairing a compromised system after the upgrade.
FAQs
1. How do I check if my computer is compatible with Windows upgrades?
Start by consulting Microsoft’s official compatibility information and—if the Windows version you wish to install includes a “PC Health Check” app—use that tool. Then, verify that essential drivers, applications, peripherals, storage, and backups are ready.
2. Why did my computer fail the Windows compatibility check?
Common causes include an unsupported processor, insufficient system configuration, TPM requirements, Secure Boot settings, inadequate storage space, or other hardware limitations. The specific cause must be identified before attempting any solutions.
3. Can I still upgrade Windows if my processor isn’t supported?
If your processor does not meet the supported hardware requirements, an officially supported upgrade may not be possible. Although unofficial workarounds may be available, they often come with limitations on support and updates, and they do not satisfy the official requirements.
4. Will my PC automatically become compatible if I enable TPM?
No. TPM is just one potential requirement. Your PC may also need a supported processor, sufficient memory and storage space, compatible firmware settings, and other necessary features.
5. Should I update my BIOS before upgrading Windows?
Consult the manufacturer’s documentation first. BIOS or UEFI updates can help resolve compatibility or stability issues, but firmware updates should not be performed indiscriminately. Always use firmware specifically designed for your device or motherboard.
6. Will applications stop working after a successful Windows upgrade?
Yes. A successful Windows installation does not guarantee compatibility with all applications or peripherals. Always check for compatibility with the developers or manufacturers of the relevant software and hardware before upgrading.

ClarityTechHub Editorial Team publishes practical technology guides covering device compatibility, accessibility, home technology, maintenance, and technology setup. Our articles focus on explaining everyday technology problems clearly, comparing practical solutions, and helping readers make informed decisions about the devices and systems they use.